Top Menu

Wednesday, March 12, 2014

SharePoint 2013 - Document Management

In this post I will explain how a Document Management System using SharePoint 2013 can be designed for an Enterprise.

I had a requirement at my work for designing a Document Management using SharePoint 2013 and here is my proposed design.

Background:
Document Center
Document Center site is designed to managed an enterprise's live documents. Users can perform different functions like create, upload, edit, check-out/in, document set, search etc on a document.

Records Center
Records Center site is designed to retain the expired/retired documents which are no longer required in a project but an enterprise keeps them for the record.

Design:
The whole life cycle would be, user will create the document on his machine and then upload it to the Document Center where a unique DocumentID will be assigned to it. The document will be live at that point, meaning it will be available for edit, check-out/check-in, search etc in the Document Center. When its time to retire the document, it will be sent to Record Center where it will be available as a Read-Only Document.

User should also be able to send email with attachments to the Document Center too.

Implementation:
 http://mysplist.blogspot.com/2014/03/sharepoint-2013-document-management_12.html

Friday, March 7, 2014

Export AD Users

I had a requirement to compare User Profile data from SharePoint with AD data and I found this little tool to export all the AD users into CSV file. Nice and easy.

CSVDE -f c:\Temp\AD_Users.csv -r objectClass=user

Other example would be

CSVDE -f AD_Users.csv -r "(&(objectClass=user)(objectCategory=person)"

and

CSVDE -d "OU=Directors,DC=domain,dc=local" -f test.csv -r "(&(objectClass=user)(objectCategory=person)"

Ref:  http://www.techrepublic.com/blog/data-center/simplify-admin-tasks-by-exporting-active-directory-data-with-csvde/#.

Friday, February 28, 2014

JavaScript Key Array

Today I discovered that javascript now supports Key Value Arrays....sweeeet.
<script type="text/javascript">

var Key = {
  a : "hello",
  b: "world"
}

alert(Key.a);
alert(Key.b);

</script>

Wednesday, February 26, 2014

Monday, February 24, 2014

SharePoint 2013 - User Profile Cleanup Timer Job

Diagrams below explain how the user profiles are getting imported by User Profile Application in SharePoint 2013 and then how they are deleted from the SharePoint.

MySites is created when user accesses the MySite Host Site.


After the profiles are marked deleted in the UserProfile_Full table, Cleanup job takes care of the dirty work.


Monday, January 27, 2014

Publishing SSRS 2008 Reports in SharePoint

In this post, I will talk about publishing and viewing SSRS 2008 reports in SharePoint 2007.

Pre Req: You should have at least one report ready to publish. I have explained how to build a report by fetching data from a SharePoint list in this post.

Following are the configuration steps you need on SQL side as well as on SharePoint side:
  1. Launch Reporting Service Configuration Manager from Start menu.
  2. Go to Database Setup tab, change Server Mode to SharePoint Integrated. It will ask you to create a new SSRS database. Go ahead and create it.
  3. Go to SharePoint Integration tab and then launch SharePoint 2007 Central Admin.
  4. In SharePoint Central Admin, go to Applications -> Reporting Services section
  5. Under Reporting Services, select Manage integration settings and provide Reporting Server URL (http://ServerName/ReportServer) and Authentication Type as Windows Authentication in dev box (Trusted Connection in production environment).
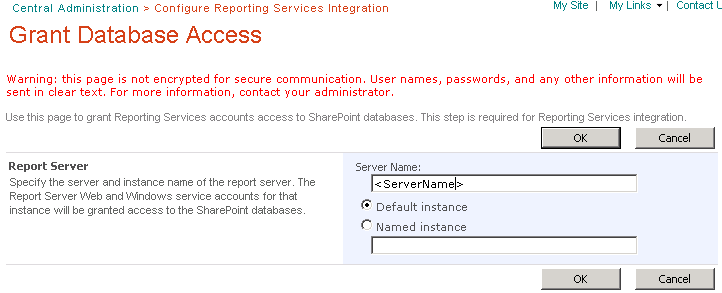
  6. Under Reporting Services, select Grant database access and provide Server Name (with farm login credentials)
  7. Go to the Site Collection features of SharePoint site collection where you want to publish/run the reports and activate Report Server Integration Feature feature.
  8. Create a Reporting Document Library and upload report file RDL and Datasource file RSDS in it. This is the document library where we will store our reports and datasources.

    You can also publish the reports and data source directly from BI Studio by these steps:
    http://technet.microsoft.com/en-us/library/bb326285
  9. Create a new blank web part page and add SQL Server Reporting Services Report Viewer web part on it. Then configure the web part properties to point to the RDL file in the document library.
  10. Save and publish the page and you should see the report in the Report Viewer web part...BOOM.

Friday, January 24, 2014

Displaying SharePoint List Data in SSRS 2008 Report

In this post, I am going to explain how to fetch data from SharePoint 2007 list and then display it in SQL Server Reporting Services (SSRS) 2008 to build a report or a dashboard.

Pre Requisite: This article assumes that following components are installed on the Windows Server:
  1. SharePoint 2007
  2. SQL Server 2005
  3. Visual Studio 2005/2008
  4. SQL Server Reporting Service 2008
With the installation of SSRS 2008, following two virtual directories will be created under default website in IIS:
  1. Reporting Server: http://localhost/ReportServer
  2. Reports Manager: http://localhost/Reports (We will be using this)
You can get configuration information about SSRS by launching Reporting Services Configuration Manager from Start menu.

Let's create a report now.
  1. Launch SQL Server Business Intelligence Development Studio from Start menu.
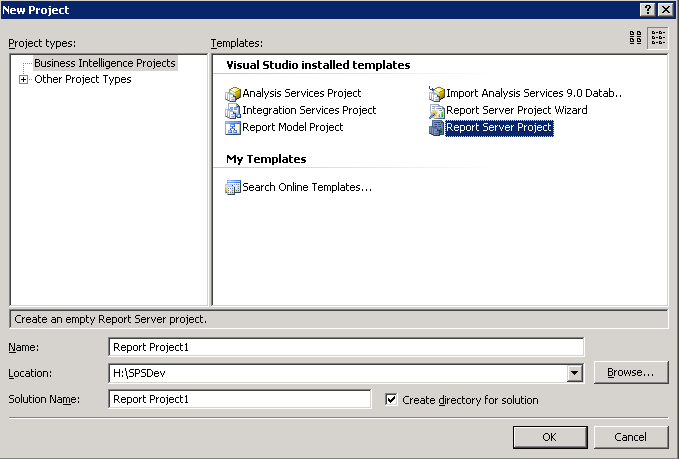
  2. Select File -> New -> Project and select Report Server Project.
  3. Once the project is created, you will see two folders: Shared Data Sources and Reports. I don't need to explain these two folders...right? :o).
  4. Create Data Source: In this step we have to define that our data source is a SharePoint 2007 List and we will connect to that list using SharePoint web services.

    Add New Data Source by r-clicking the Create Data Sources folder and specify the name as SharePointDataSource, type as XML and Connection string as https://<sharepointsite>/_vti_bin/lists.asmx
  5. Create Report: We have a custom list List9 in our SharePoint Site which we want to show in the report. Here is how the data in List9 looks like:
     
  6. R-click Reports folder and select Add New Report. This will launch Report Wizard. In the Report Wizard specify the data source (SharePointDataSource) created in the step 4 here.

    In the next screen provide the Query String specifying the List Name and columns etc.

    Here is a sample XML:
    <Query>
      <SoapAction>http://schemas.microsoft.com/sharepoint/soap/GetListItems</SoapAction>
      <Method Namespace="http://schemas.microsoft.com/sharepoint/soap/" Name="GetListItems">
          <Parameters>
             <Parameter Name="listName">
                <DefaultValue>List9</DefaultValue>
             </Parameter>
             <Parameter Name="viewName">
                <DefaultValue></DefaultValue>
                <ViewFields>
                   <FieldRef Name="Title" />
                   <FieldRef Name="Choice" />
                </ViewFields>
             </Parameter>
          </Parameters>
       </Method>
       <ElementPath IgnoreNamespaces="True">*</ElementPath>
    </Query>
    
    In the next screen choose Tabular

    In the next screen, under Details add ows_Title and ows_Choice columns.

    In the next screen select the Table Style


    hit last Next and then Finish.


    You will see your first report as follow


    Hit Preview tab to run the report and see the data from List9 list from SharePoint.
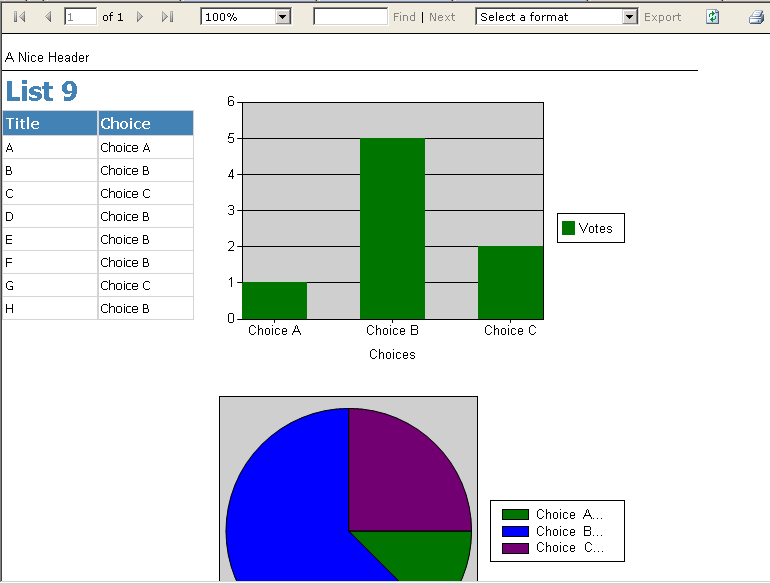
    Now is the time to make report pretty e.g. change title, add graphs or add additional columns.

  7. Publish: Lets publish the report on the Reporting Manager/Server.

    Go to the project folder and upload Report1.rpt and SharePointDataSource.rds files to http://localhost/Reports. I have renamed my datasource file to ds_SPList on the Reporting Server.


    Click Report1 and you should see the data from SharePoint List 9.

Official SharePoint Documentation

I have recently contributed to the official SharePoint documentation for developement. Check it out here: https://docs.microsoft.com/en-us...